Access Pi Remotely Free: The Ultimate Guide To Unleashing Your Raspberry Pi’s Potential
Accessing your Raspberry Pi remotely for free has become an essential skill for tech enthusiasts and hobbyists alike. Imagine being able to control your Pi from anywhere in the world without breaking the bank. Sounds amazing, right? Well, it's not only possible but also surprisingly simple with the right tools and techniques. Whether you're a beginner or a seasoned pro, this guide will walk you through everything you need to know about accessing your Pi remotely for free.
In today’s digital age, remote access to devices is no longer a luxury but a necessity. From monitoring home security systems to automating smart home setups, having the ability to control your Raspberry Pi remotely opens up a world of possibilities. And the best part? You don’t have to spend a dime to achieve this.
This article is packed with practical tips, step-by-step instructions, and expert advice to help you set up remote access to your Raspberry Pi without any hidden costs. So, buckle up and let’s dive into the world of remote computing!
- Signature Series Restroom Dispensers Revolutionizing Hygiene And Style
- Rasheed Thurmond Net Worth Unveiling The Wealth Behind The Iconic Name
Here’s what we’ll cover in this guide:
- Why remote access is important for Raspberry Pi users
- Free tools and methods to access your Pi remotely
- Step-by-step setup instructions
- Troubleshooting common issues
- Advanced tips for securing your remote connection
Let’s get started!
Table of Contents
- Why Remote Access Matters for Your Raspberry Pi
- Free Methods to Access Pi Remotely
- Setting Up SSH for Remote Access
- Using VNC for a Graphical Interface
- Access Pi Remotely Using Ngrok
- Setting Up Dynamic DNS with No-IP
- Security Tips for Remote Pi Access
- Troubleshooting Common Issues
- Advanced Tips for Power Users
- Conclusion: Take Control of Your Pi Anywhere
Why Remote Access Matters for Your Raspberry Pi
Let’s face it—Raspberry Pi is more than just a tiny computer. It’s a versatile tool that can power everything from home automation systems to web servers. But what happens when you’re not physically near your Pi? That’s where remote access comes in.
- Taylor Swift And Jake Gyllenhaal The Story Of Hollywoods Golden Couple
- Unveiling The Mysteries Of December 17 Zodiac A Deep Dive Into Sagittarius And Capricorn Traits
Remote access allows you to control your Pi from anywhere in the world, as long as you have an internet connection. Whether you’re troubleshooting a project from work or checking on your home security system while on vacation, remote access gives you the freedom to manage your Pi effortlessly.
Here are some key reasons why remote access matters:
- Convenience: No need to be physically present to interact with your Pi.
- Flexibility: Work on your projects from anywhere, anytime.
- Cost-Effective: Many remote access solutions are free, saving you money on expensive hardware.
- Security: Monitor and manage your Pi’s security settings remotely to prevent unauthorized access.
Free Methods to Access Pi Remotely
Now that you understand the importance of remote access, let’s talk about how you can do it without spending a penny. There are several free methods available, each with its own strengths and limitations. Here are some of the most popular options:
SSH: The Go-To Method
Secure Shell (SSH) is one of the simplest and most reliable ways to access your Pi remotely. It allows you to connect to your Pi’s terminal from another device, giving you full control over its operations.
Why SSH?
- Easy to set up
- Secure connection
- No graphical interface needed
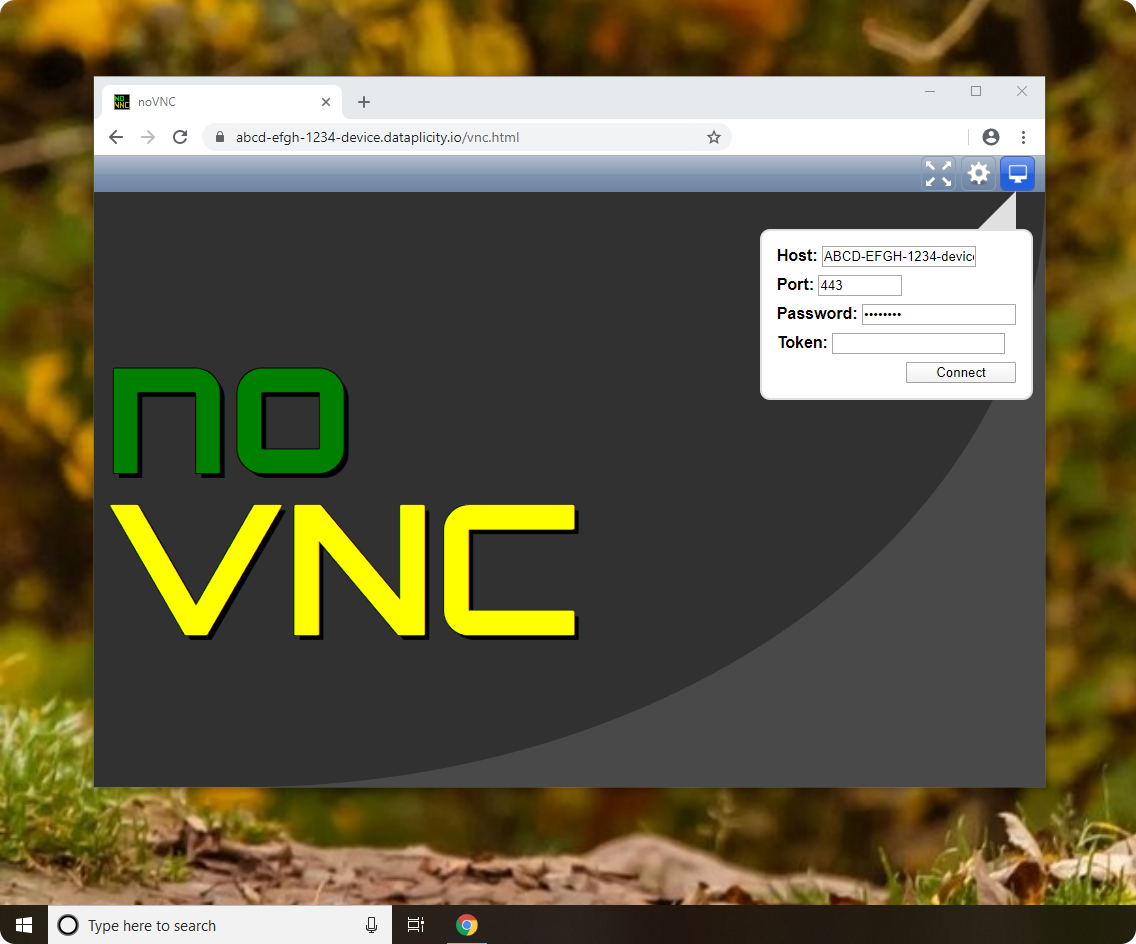
VNC: For a Graphical Experience
If you prefer a graphical interface, Virtual Network Computing (VNC) is the way to go. VNC lets you access your Pi’s desktop remotely, making it ideal for projects that require visual interaction.
Why VNC?
- Full graphical access
- Great for beginners
- Compatible with multiple platforms
Setting Up SSH for Remote Access
Setting up SSH on your Raspberry Pi is a breeze. Follow these steps to get started:
- Enable SSH on your Pi by running the command
sudo raspi-configand selecting "Interfacing Options"> "SSH"> "Enable." - Find your Pi’s IP address using the command
hostname -I. - On your remote device, download and install an SSH client like PuTTY (for Windows) or use the built-in Terminal app (for macOS and Linux).
- Enter your Pi’s IP address and log in using your Pi’s credentials.
And just like that, you’re connected to your Pi’s terminal from anywhere!
Using VNC for a Graphical Interface
For those who prefer a more visual approach, VNC is the perfect solution. Here’s how to set it up:
- Enable VNC on your Pi by running
sudo raspi-configand selecting "Interfacing Options"> "VNC"> "Enable." - Download the VNC Viewer app on your remote device.
- Connect to your Pi by entering its IP address in the VNC Viewer app.
With VNC, you’ll have full control over your Pi’s desktop environment, making it easier to manage complex projects.
Access Pi Remotely Using Ngrok
Ngrok is a powerful tool that allows you to expose your local Raspberry Pi server to the internet. It’s perfect for testing web applications or sharing your Pi’s services with others.
How to Use Ngrok:
- Install Ngrok on your Pi by following the instructions on the official Ngrok website.
- Run the command
ngrok http 80to expose your Pi’s web server. - Share the generated Ngrok URL with anyone who needs access to your Pi’s services.
Ngrok is a game-changer for developers and hobbyists alike, offering a quick and easy way to share your Pi’s capabilities with the world.
Setting Up Dynamic DNS with No-IP
If your Pi’s IP address changes frequently, Dynamic DNS (DDNS) can help you maintain a stable connection. No-IP is a popular DDNS service that offers free accounts for personal use.
Steps to Set Up No-IP:
- Create a free account on No-IP’s website and register a hostname.
- Install the No-IP DUC (Dynamic Update Client) on your Pi by running
sudo apt-get install noip2. - Configure the No-IP client with your account details and hostname.
With No-IP, you’ll always have a consistent way to access your Pi, even if its IP address changes.
Security Tips for Remote Pi Access
Security should always be a top priority when accessing your Pi remotely. Here are some tips to keep your Pi safe:
- Use Strong Passwords: Avoid using default passwords like "raspberry" and opt for complex, unique combinations.
- Enable Two-Factor Authentication: Add an extra layer of security by requiring a second form of verification.
- Keep Software Updated: Regularly update your Pi’s operating system and applications to patch security vulnerabilities.
- Use a Firewall: Configure a firewall to block unauthorized access to your Pi.
Troubleshooting Common Issues
Even with the best setup, things can go wrong. Here are some common issues and how to fix them:
Problem: Can’t Connect to Pi via SSH
Solution: Double-check your Pi’s IP address and ensure SSH is enabled. Also, make sure your firewall isn’t blocking the connection.
Problem: VNC Connection Fails
Solution: Verify that VNC is enabled on your Pi and that the VNC Viewer app is correctly configured with the right IP address.
Problem: Ngrok Connection Times Out
Solution: Ensure your Pi’s web server is running and that Ngrok is properly installed and configured.
Advanced Tips for Power Users
If you’re looking to take your remote Pi access to the next level, here are some advanced tips:
- Set Up a Static IP Address: Prevent IP address changes by assigning a static IP to your Pi.
- Use SSH Tunnels: Create secure tunnels to access other services running on your Pi.
- Automate Tasks with Cron Jobs: Schedule tasks to run automatically, even when you’re not connected.
Conclusion: Take Control of Your Pi Anywhere
Accessing your Raspberry Pi remotely for free is not only possible but also incredibly rewarding. From setting up SSH to using advanced tools like Ngrok and No-IP, this guide has equipped you with everything you need to take control of your Pi from anywhere in the world.
Remember, security is key. Always follow best practices to protect your Pi from unauthorized access. And don’t forget to experiment with different methods to find the one that works best for your projects.
Now it’s your turn! Try out these methods, share your experiences in the comments below, and let us know which one worked best for you. Happy Pi-ing!

Detail Author:
- Name : Carmella Fay
- Username : gbergnaum
- Email : mylene.denesik@koelpin.com
- Birthdate : 2003-09-15
- Address : 402 Ima Tunnel Dorashire, MD 11398-5582
- Phone : (207) 484-4883
- Company : Bins-Hartmann
- Job : Oil Service Unit Operator
- Bio : Et qui inventore harum. Aperiam occaecati inventore voluptas et officia delectus tenetur. Officia voluptatum vel perferendis dolore beatae quas ipsa.
Socials
linkedin:
- url : https://linkedin.com/in/estebanmueller
- username : estebanmueller
- bio : Minus et porro nulla et.
- followers : 328
- following : 940
twitter:
- url : https://twitter.com/emueller
- username : emueller
- bio : Et enim mollitia inventore neque. Dolorum reprehenderit qui voluptas enim est. Enim doloribus consequatur libero inventore eum ut.
- followers : 4317
- following : 1269
facebook:
- url : https://facebook.com/emueller
- username : emueller
- bio : Eaque sit exercitationem perspiciatis veritatis consequatur.
- followers : 2047
- following : 1064
tiktok:
- url : https://tiktok.com/@estebanmueller
- username : estebanmueller
- bio : Pariatur possimus similique distinctio in.
- followers : 4141
- following : 2239
instagram:
- url : https://instagram.com/estebanmueller
- username : estebanmueller
- bio : Ut ex quo delectus. Debitis maxime id ut optio dolores. Aut consectetur tenetur at sapiente.
- followers : 2829
- following : 605
